Masked Pictures Flipped Over When Smartnotebook Doc Is Opened Again
Working with objects in SMART Notebook 16
![]() Overview
Overview
Subsequently creating an object in SMART Notebook software, you can select information technology and work with it every bit described on this page.
Annotation
The tasks described on this page are for all objects, non only basic objects.
![]() Selecting objects
Selecting objects
Before yous can work with an object, you must select it. You can select an individual object, multiple objects or all objects on a folio. When you select an object, a selection rectangle appears effectually it.
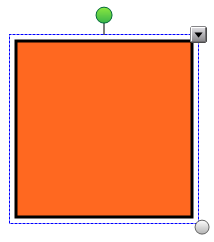
The gray circle in the object's lower-right corner is a resize handle.
The green circle above the object is a rotation handle.
The downward arrow in the object'south upper-right corner is a menu arrow. Press the menu arrow to display a menu of commands.
Note
Pressing an object'due south menu arrow gives you admission to the same menu as right-clicking the object.
To select an object
-
Press Select
 .
. -
Press the object you lot want to select.
A pick rectangle appears around the object.
Note
If y'all printing an object and a lock symbol appears instead of the carte pointer, the object is locked. Depending on the type of lock, you might take to unlock the object before you lot can manipulate it.
To select multiple objects
-
Printing Select
. -
Press the interactive screen and drag until a rectangle surrounds the objects you want to select.
OR
Hold downward CTRL (Windows operating systems) or the COMMAND (⌘) key (OS X operating organisation software), and then press the objects you want to select.
A selection rectangle appears around the selected objects.
Note
If you draw a rectangle effectually multiple objects and some of the objects are locked, you select only the unlocked objects.
To select all objects on a page
-
Select Edit > Select All.
A selection rectangle appears around all objects on the page.
Note
If some of the objects are locked, y'all select simply the unlocked objects.
To select all locked objects on the folio
-
Select Edit > Select All Locked Notes.
A selection rectangle appears around all locked objects on the page.
![]() Changing object properties
Changing object properties
Y'all can alter an object's backdrop. The properties you can change depend on the object yous select. Yous can also select several objects and alter their properties at the aforementioned time.
![]() Irresolute the fill up
Irresolute the fill up
You can change an object's fill past selecting the object and then setting the fill in the Properties tab or past clicking Fill , setting the make full, and then selecting the object.
To change an object'southward fill by showtime selecting the object
-
Select the object.
-
If the Properties tab isn't visible, press Properties
 .
. -
Press Fill Effects.
-
Select a fill style:
Fill style
Procedure
None (transparent)
-
Select No fill.
Solid colour
-
Select Solid fill.
-
Do one of the post-obit:
-
Select one of the 40 colors in the palette.
-
Press More than, so select a color in the dialog box.
-
Printing the eyedropper
 , and so select a color on the screen.
-
Gradient of ii colors
-
Select Gradient fill.
-
For each color, practise 1 of the following:
-
Select one of the 40 colors in the palette.
-
Press More, and so select a color in the dialog box.
-
Press the eyedropper
, and so select a color on the screen.
-
-
Select an option in the Style drop-down list.
Blueprint
-
Select Pattern fill.
-
Select a pattern.
-
Press Foreground colour, select a color in the dialog box, and then press OK.
-
Press Background color, select a color in the dialog box, and then press OK.
Moving-picture show
-
Select Paradigm fill.
-
Press Browse.
A dialog box appears.
-
Browse to and select the pic yous want to employ as a groundwork, and then press Open up.
Note
If you lot insert a large flick, a dialog box may announced and prompt you lot to either reduce the picture'south file size or retain the picture's file size. For more information, run into Setting image optimization preferences.
-
Select Keep image size to keep the picture's size, regardless of whether the picture is larger or smaller than the object.
OR
Select Scale image to fit to resize the picture show to fit the object.
-
-
Optionally, drag the Object transparency slider to the right to make the object transparent.
Tip
You tin can also change an object'southward properties using the belongings selectors on the toolbar.
To change an object's fill past get-go pressing the Make full button
-
Press Fill
, and so select a colour. -
Select the object.
-
Repeat step 2 for each object you lot desire to apply the fill to.
![]() Filling digital ink drawings
Filling digital ink drawings
In addition to filling shapes, regular polygons and irregular polygons, you lot tin can fill areas enclosed by digital ink using the Fill button.
Notes
-
To fill an surface area, you must enclose it with a single digital ink path.
-
You lot're unable to fill an enclosed expanse if that area is part of a group (encounter Group objects).
-
When you lot fill an enclosed area, the make full becomes a separate object, which you can motility abroad from the original enclosed area. You can fill up the enclosed area and motion the resulting make full object multiple times.
![]() Changing other properties
Changing other properties
In addition to make full, you can change objects' line way and text style.
To modify an object's line mode
-
Select the object.
-
If the Properties tab isn't visible, press Properties
. -
Press Line Style.
-
Change the object'due south line style.
To change an object'due south text style
-
Select the object.
-
If the Properties tab isn't visible, printing Properties
. -
Press Text Style.
-
Alter the object'south text style (encounter Formatting text).
![]() Saving tool settings
Saving tool settings
When you select a tool in the toolbar, you can change its default settings using the Backdrop tab and and then salvage your changes by clicking Salve Tool Backdrop.
When you salve your changes to a tool'due south default settings, the tool's button displays those changes:
To restore the default settings, encounter Customizing the toolbar.
![]() Positioning objects
Positioning objects
Yous can alter the position of an object by moving information technology to some other area of the existing page or to another page. You can also align objects and modify the order of stacked objects.
![]() Aligning objects
Aligning objects
You can utilise the Alignment Tools add-on to align and distribute objects on a folio. You lot can align selected objects on the bottom, left, right, top, vertically or horizontally. Y'all tin too align stacked objects vertically or horizontally.
If y'all want, you can display guidelines on a folio to assist you in manually adjustment objects with other objects, as well as the page's vertical and horizontal centers. You can as well fix objects to align automatically with these guidelines when yous move the objects on a page.
To align objects on a folio
-
Select the objects you desire to align.
-
Press Add together-ons
 on the toolbar to display the Alignment Tools buttons.
 -
Printing an alignment push button:
Button
Name Select this button to:

Marshal lesser Marshal selected objects forth their bottom edge.

Align left Marshal selected objects along their left border.

Align middle 10 Marshal selected objects vertically through the center of the objects.

Marshal middle Y Align selected objects horizontally through the middle of the objects.

Align correct Align selected objects along their right edge. 
Align tiptop Marshal selected objects along their elevation edge. 
Stack horizontally Align selected stacked objects horizontally. 
Stack vertically Align selected stacked objects vertically.
To display guidelines
-
Select View > Alignment.
A dialog box appears.
-
Select check boxes to specify which guidelines y'all want to display:
Check box
Select this check box to:
Prove guides for active objects
Display a guideline when you move an object into alignment with another object.
Evidence vertical page middle guide
Display a guideline when you motion an object into alignment with the page's vertical center.
Show horizontal page center guide
Brandish a guideline when you move an object into alignment with the page'southward horizontal center.
Snap objects to guides
Automatically align objects to guidelines when you move the objects on a page.
-
If you lot want to change the color of the guidelines, press the colored bar to the left of Guide color, and and so select a color.
-
Printing OK.
![]() Rearranging stacked objects
Rearranging stacked objects
If objects overlap on a page, you tin can rearrange the social club of the stack (that is, you tin control which objects appear in front of others).
Annotation
You're unable to move an object in the stack if it'due south locked in identify.
To motion an object to the front of the stack
-
Select the object.
-
Press the object'southward menu arrow, so select Guild > Bring to Front.
To move an object to the back of the stack
-
Select the object.
-
Press the object'southward card arrow, then select Club > Send to Back.
To movement an object ane place frontwards in the stack
-
Select the object.
-
Press the object'due south menu arrow, and then select Order > Bring Forwards.
To motion an object one identify astern in the stack
-
Select the object.
-
Select the object's menu arrow, and and so select Order > Transport Backward.
![]() Cutting, copying and pasting objects
Cutting, copying and pasting objects
You can cut, re-create and paste objects—including text, pictures, straight lines, arcs and shapes—in a .notebook file.
Tips
-
You lot can paste text from other programs into SMART Notebook software and cut text from SMART Notebook software and paste it into other programs.
-
You can create an verbal copy of an object past cloning it.
To cut and paste an object
-
Select the object.
-
Printing the object's bill of fare pointer, so select Cut.
Tip
Alternatively, you lot can press Cut
 if you added this button to the toolbar.
 -
If yous desire to paste the object onto a different page, brandish that page.
-
Press Paste
 .
.
To copy and paste an object
-
Select the object.
-
Press the object's card arrow, and and so select Copy.
-
If y'all want to paste the item onto a different page, display that page.
-
Press Paste
.
![]() Cropping images with a mask
Cropping images with a mask
You lot can use a mask to crop images. The mask hides the section of the image you ingather out instead of deleting it. This enables you to edit the mask if you want to crop a different section of the image. You can also unmask the image to restore the original image.
Annotation
You can crop raster images only. For case, you tin ingather raster pictures you insert from the Gallery or from your figurer. You're unable to crop other types of objects.
To crop an paradigm with a mask
-
Select the image.
-
Press the image'south menu arrow, and then select Mask.
A cropping mask appears on the epitome. Cropped out sections of the epitome are shaded gray.
-
Elevate the paradigm until the department of the image y'all want to proceed appears in the cropping mask.
-
Optionally, press one of the cropping mask's eight resize handles (the white circles), and then drag it to increase or reduce the cropping mask's size.
-
Press anywhere outside of the image to crop it.
To edit the mask
-
Select the epitome.
-
Printing the image's menu pointer, and so select Edit Mask.
A cropping mask appears on the epitome. Cropped out sections of the image are shaded greyness.
-
Drag the paradigm until the section of the image you desire to keep appears in the cropping mask.
-
Optionally, press 1 of the cropping mask's eight resize handles (the white circles), and then elevate it to increase or reduce the cropping mask's size.
-
Press anywhere outside of the image to ingather information technology.
To restore the prototype
-
Select the epitome.
-
Printing the image's menu arrow, and so select Unmask.
The original paradigm is restored.
![]() Cloning objects
Cloning objects
You can create a duplicate of an object by using the Clone command, or you tin can create multiple copies of an object using the Infinite Cloner command.
Note
Y'all can besides copy and paste objects, including text, images, straight lines, arcs and shapes (encounter Cutting, copying and pasting objects).
To clone an object
-
Select the object.
-
Printing the object'due south menu pointer, and then select Clone.
A duplicate object appears on the page.
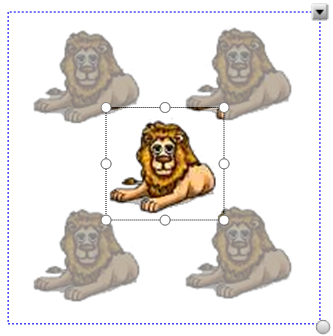
To clone an object using the Infinite Cloner
-
Select the object.
-
Press the object's carte arrow, and so select Space Cloner.
-
Select the object once more.
An infinity symbol appears instead of the object's menu arrow.
-
Elevate the object to another position on the page.
-
Repeat step 4 equally many times every bit yous want.
-
When you terminate cloning the object, select the original object.
-
Printing the infinity symbol, so clear the pick of Infinite Cloner.
![]() Resizing objects
Resizing objects
Yous tin resize objects on a page past using the resize handle or the scale gesture (if your interactive product supports multitouch gestures).
Annotation
Y'all're unable to resize an object if it's locked in place.
To resize an object using the resize handle
-
Select the object.
-
Press the object's resize handle (the grayness circle), and then drag it to increase or reduce the object's size.
Note
To go along the shape's original top-to-width ratio, agree downward SHIFT while you elevate the resize handle (Windows operating organization only).
To resize multiple objects using the resize handle
-
Grouping the objects (see Grouping objects), and so select the group.
A selection rectangle appears around the grouping.
-
Printing the resize handle in the lower-right corner of the choice rectangle.
-
Drag the resize handle to increase or reduce the size of the objects.
To resize or calibration an object from its eye using gestures
-
Select the object.
-
Using i finger on each hand, printing the screen at reverse ends of the object.
-
Drag your fingers in opposite directions to increase the object's size.

OR
Elevate your fingers toward each other to decrease the object's size.

To resize an object from its corner or side using gestures
-
Select the object.
-
Using one finger on each mitt, press the screen at the corner or side you want to resize the object from.
-
Drag your fingers in contrary directions to increase the object's size.
OR
Drag your fingers toward each other to decrease the object'due south size.
To resize multiple objects using gestures
-
Select the objects.
-
Using ane finger on each hand, printing the screen at opposite ends of one of the objects.
-
Drag your fingers in opposite directions to increase the objects' size.
OR
Elevate your fingers toward each other to decrease the objects' size.
Notation
The objects resize from their centers regardless of where yous press the screen.
![]() Flipping objects
Flipping objects
You tin can flip an object on a page.
Note
You're unable to flip an object if it'due south locked in identify.
To flip an object
-
Select the object.
-
Press the object's carte arrow, and then select Flip > Up/Down or Flip > Left/Right.
To flip multiple objects
-
Select the objects.
-
Press the menu arrow on any one of the selected objects, and so select Flip > Up/Downwardly or Flip > Left/Correct.
![]() Grouping objects
Grouping objects
You can create a grouping of objects, which lets yous interact with all grouped items at the same time. After you create a group, you can select, move, rotate or resize the group equally if it were an individual object. However, if yous want to interact with an individual object in a group, yous must ungroup the objects outset.
Yous can group and ungroup objects manually using the menu or the shake gesture.
Notes
-
You're unable to utilise the shake gesture with a mouse.
-
The milkshake gesture works simply when you initially contact your interactive product'south surface.
To grouping objects using the menu
-
Select the objects.
-
Press the menu pointer of any ane of the selected objects, and then select Group > Grouping.
To ungroup objects using the menu
-
Select the group.
-
Printing the grouping'due south menu arrow, and and so select Group > Ungroup.
To grouping objects with the shake gesture
-
Quickly shake your finger over the objects three times.

To ungroup objects with the milk shake gesture
-
Quickly shake your finger over the group 3 times.
![]() Group objects automatically
Group objects automatically
If you write or draw multiple lines, SMART Notebook software automatically combines the lines into a unmarried object. For example, if you write the messages of a discussion, SMART Notebook software combines the private letters, enabling you to interact with the whole word. If you want to write words on the same line simply don't desire them combined, leave a large gap between them, use unlike pens, or briefly put the pen in the pen tray before writing another word (interactive whiteboards only).
If SMART Notebook software combined lines that y'all want to manipulate individually, ungroup the lines as described above.
![]() Deleting objects
Deleting objects
Although you can erase digital ink, yous're unable to erase some types of objects, including text, shapes, direct lines, arcs and pictures. To remove these types of objects from a page, you must delete them.
Note
You're unable to delete an object if it'south locked in place. To delete a locked object from a folio, you must unlock it.
To delete an object
-
Select the object.
-
Press the object's carte du jour arrow, and then select Delete.
Was this data helpful?
YesNo
Source: https://support.smarttech.com/docs/software/notebook/notebook-16/en/using/learning-the-basics/working-with-objects.cshtml
0 Response to "Masked Pictures Flipped Over When Smartnotebook Doc Is Opened Again"
Post a Comment